Member Updates – Multiple Members
DISCLAIMER
Please note, whilst care is taken to illustrate numerous scenarios, it is impossible to detail all instances and therefore this document should merely serve as a guide for the purposes of demonstrating system functionality and conducting employee training.
In accordance with the above paragraph, this training manual is published and distributed on the basis that EBSphere (Pty) Ltd is not responsible/accountable for any actions taken by users of information contained in this training manual nor for any error in or omission from this manual.
EBSphere (Pty) Ltd does not accept any responsibility whatsoever for a misrepresentation performed by any person in respect of claims, losses or damage or any other matter, either direct or consequential arising out of or in relation to the use and reliance, whether wholly or partially, upon any information contained or products referred to in this manual.
Further, the contents of this training manual are subject to change without any notice and further highlight the need for this training manual to serve only as a guide.
COPYRIGHT
This documentation and the software described in it is the exclusive property of EBSphere (Pty) Ltd. This manual or the software may not be copied in whole or part, without the express written consent of EBSphere (Pty) Ltd. Under the law, copying includes translating into another language or format.
EBSphere (Pty) Limited
P.O. Box 785803
Sandton
2146
 Member Updates – Multiple Members
Member static data changes can be updated on screen or via an import. This manual covers importing changes, but should you wish to make the changes manually on the front end, please refer to the manual “Member Updates – Single Member”.
To update member details in bulk, you can use the batch “Update Member Data”.
The best way to utilise this import is to start with an “Export Member Data” batch. While on the client go to the Batches menu, select “Batch Management” and search for the batch:

Click on the “New Batch” button. The batch will be added to the Batch Management pane.
Double click the “edit” hyperlink:


The Batch Editor screen will open:

Client: This is automatically populated with the client you were on when selecting the batch.
Effective Date: This is the END date, i.e. if you want to see all members who joined up to current date, you would insert current date.
Filename: Browse to where you want to save the file.
Date 1: This date is effectively the “Date Joined Fund” date. If you want to see ALL members on the Fund, insert the date 01/01/1900. If you are only interested in members who joined from a specific date, insert that date.
Filename: Select “Yes” to include exits or “No” to exclude exits.
Click on “Save” and “Execute”.
An excel file will populate with all of the static data currently on the member records:







Isolate the columns for the data you want to update, and delete all columns you don’t want to update EXCEPT the “System No” column as this field is required for the “Update Member Data” batch to work, and remove any rows for members that do not require an update:


Once complete, save the file and go to “Batch Management” via the Batches Screen:

Select the “Update Member Data” batch from the “All” Batch Types, and click on the “New Batch” button:

Double click the edit hyperlink:


A Batch Editor screen will open:

Client: This is automatically populated with the client you were on when selecting the batch.
Effective Date: This is the date you want to update the records. NB! If you are updating categories, paypoints, branches, risk policies and investments the date must be the effective date that these new details come into effect.
Filename: Browse to where you saved the file.
Click on “Save” and “Execute”.
2 reports will populate.
The first report will reflect all of the fields that have been recognised in the import, any fields that must be imported for the import to work, as well as fields that were not recognised in the file:


Should there be any columns not recognised, or mandatory fields that were left out, update the headings of the file, or add columns as needed.
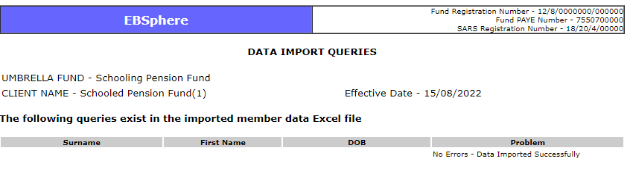
The second report will advise if the import was successful. If not successful investigate the errors as advised on the report:
Return to Everest to check a few members to ensure that the fields were correctly populated.