Creating a New User in Everest
DISCLAIMER
Please note, whilst care is taken to illustrate numerous scenarios, it is impossible to detail all instances and therefore this document should merely serve as a guide for the purposes of demonstrating system functionality and conducting employee training.
In accordance with the above paragraph, this training manual is published and distributed on the basis that EBSphere (Pty) Ltd is not responsible/accountable for any actions taken by users of information contained in this training manual nor for any error in or omission from this manual.
EBSphere (Pty) Ltd does not accept any responsibility whatsoever for a misrepresentation performed by any person in respect of claims, losses or damage or any other matter, either direct or consequential arising out of or in relation to the use and reliance, whether wholly or partially, upon any information contained or products referred to in this manual.
Further, the contents of this training manual are subject to change without any notice and further highlight the need for this training manual to serve only as a guide.
COPYRIGHT
This documentation and the software described in it is the exclusive property of EBSphere (Pty) Ltd. This manual or the software may not be copied in whole or part, without the express written consent of EBSphere (Pty) Ltd. Under the law, copying includes translating into another language or format.
EBSphere (Pty) Limited
P.O. Box 785803
Sandton
2146
 The creation of the new User can only be done by a Master User/ Super User.
Check if the User already exists
Always check to ensure that the User does not already exist in the database. Type the User’s Surname and Name in the “Search” field provided. Do not click on the search button.


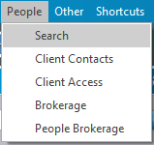
Select the People menu at the top of the page and select Search. The new user should not exist before proceeding.
Adding the new User
Select “Click here to add a new row” to create an entry for the new user. Complete the required fields and press the Save icon. 


Double click on the view hyperlink on the right. Select the Edit button and ensure that the user has been flagged as an Administrator by placing a tick in the field provided on the Personal Info tab.

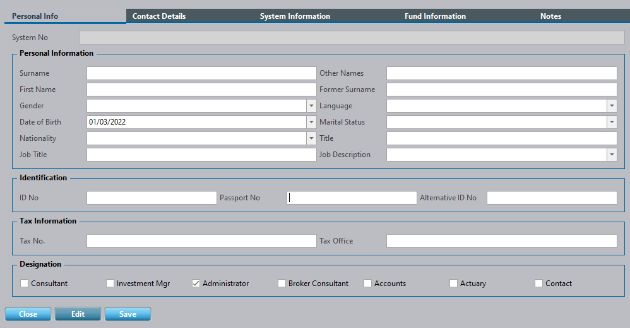
Select the System Information tab to provide the user with relevant access.

Complete the required information: -
Username Add the Username in the format the business requires
Expires Select the current date to ensure that the user resets the password on initial login
Password Create a default password for the user
Web Pwd Create a default web password for the user (if applicable)
User Level Select the level of access the user requires from the drop down
Select the Save button.
Ensure an email is sent to the User with their login details – Everest does not send an automated email.