Monthly Payroll workflow
DISCLAIMER
Please note, whilst care is taken to illustrate numerous scenarios, it is impossible to detail all instances and therefore this document should merely serve as a guide for the purposes of demonstrating system functionality and conducting employee training.
In accordance with the above paragraph, this training manual is published and distributed on the basis that EBSphere (Pty) Ltd is not responsible/accountable for any actions taken by users of information contained in this training manual nor for any error in or omission from this manual.
EBSphere (Pty) Ltd does not accept any responsibility whatsoever for a misrepresentation performed by any person in respect of claims, losses or damage or any other matter, either direct or consequential arising out of or in relation to the use and reliance, whether wholly or partially, upon any information contained or products referred to in this manual.
Further, the contents of this training manual are subject to change without any notice and further highlight the need for this training manual to serve only as a guide.
COPYRIGHT
This documentation and the software described in it is the exclusive property of EBSphere (Pty) Ltd. This manual or the software may not be copied in whole or part, without the express written consent of EBSphere (Pty) Ltd. Under the law, copying includes translating into another language or format.
EBSphere (Pty) Limited
P.O. Box 785803
Sandton
2146

 Monthly Payroll Workflow
INITIATING THE WORKFLOW
Select the relevant Pensioner Client.
Go to Batches Batch Management and select the “Member Payments Workflow – Monthly” batch.
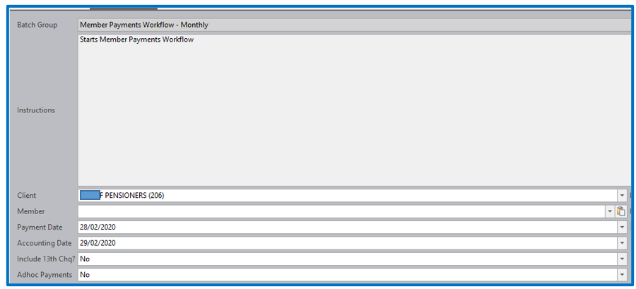
Complete the required parameters.
Client This field will default with the selected Client.
Payment Date This will be the date payment is expected to be made.
Accounting Date This will be the month end date.
Include 13th Chq? This field must always be “No”.
Adhoc Payments This field must always be “No”.
Select “Save” and “Execute.”
THE WORKFLOW PROCESS
The workflow will now start. Follow the guided steps as illustrated in screen snippets below.
IMPORTANT NOTE
The first 3 steps of the workflow allow additional deductions, such as insurance policy payments, to be loaded. This is not a requirement at all clients. Should these steps not apply, complete the steps as a formality.
Step: (Workflow Start – Normal)
Click on the “Check Deduction Files” button to start the workflow process.

Step: (Deduction Import)
Click on the “Done” button to complete the step. An Excel report will populate. IGNORE THIS REPORT.
Step: (Confirm Deduction Files)
Click on the “Yes” button to complete the step. An html report will populate. IGNORE THIS REPORT.
Step: (Member Payments Accrual)
Click on the “Done” button to start the accrual calculation process.

An excel report will populate. Check the report to ensure that the member payments and tax has calculated correctly. If not, ensure that the necessary corrections are done on the member record and the accrual step is run again.

Step: (Variance Report)
Click on the “Done” button to continue to next step. The Variance Report will populate.
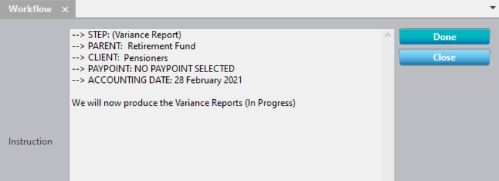
Check the variance report and ensure all data is correct.

Step: (Confirm Accrual)
Select the “YES” option to proceed to the next step.
The “NO” button will start the workflow from the beginning.
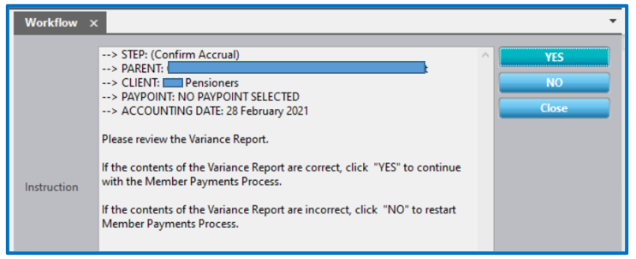
A report will populate confirming whether the accruals have been completed successfully or not. Please take special note of the report. DO NOT continue if the confirmation was not successful.
Step: (Accrual Completed)

Select Yes to continue with the workflow. This option will write up the payments for the Members and the Creditors.
Select No to redo the accrual and confirmation.
A report will populate containing the payments written up.

Step: (Make Payments)
The final step in the workflow acts as a reminder to the user to go to the Payment Management screen at a Parent Level and release the payments to the Members.
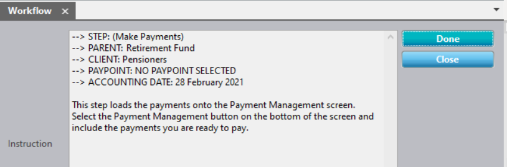
The workflow will now close.
 Making a Payment
The user must remember to go to Accounts Cashflows Member Payments Payable – Creditors to ensure that the Creditors are paid.

The user must also remember to go to Accounts Payment Management to ensure that the Members are paid.